 My mom got me a noodle machine for Christmas this year, in addition to some mini cupcake pans. So now I have a noodle machine. And If I may say so myself, home made noodles trump store bought any day. Even the ones you buy in the frozen foods section.
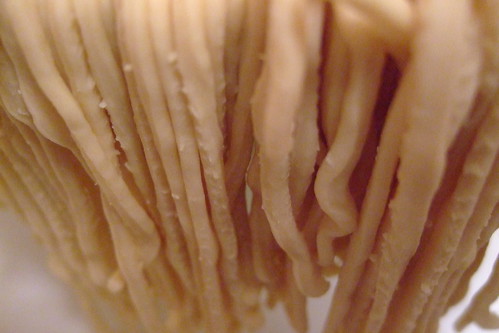
You don't, however, need a noodle machine. Just a rolling pin, a sharp knife, and the desire to die happy:
Pasta (this is not my recipe, but all recipes on the internet and in books generally point to this recipe. Plus it is easily doubled.) Serves 2ish sort-of hungry but not starving people.
-1 cup all purpose flour (recipes suggest semolina, but if both whole foods and giant eagle didn't have it, good luck and try the strip district maybe?)
-1 egg, well beaten
-1/2 tsp salt (my mother is now warning of the dangers of regular table salt, so you might want to use sea or kosher)
-a small amount of water as needed
1. Combine flour and salt.
2. Make a well and add the egg. Gradually incorporate the flour. Or if you're like me, and this fails every time, just mix them until a dough forms.
3. You want the dough to stick together and be solid, but kind of dry. In my experience, if its too wet, it won't go through my machine correctly. So if after you mix, you still have a powdery mess, add water. If you have a ball of dough, don't.
4. Let it sit there. For like 20 minutes.
5. Cut into about 4 sections. If you don't have a machine, roll each separately, then cut into noodles. A pizza cutter would work well here if you have one.
6. Bring about 2 quarts of water to a rolling boil. Home made noodles take 3-4 minutes to cook, much less time than store bought.

So you want a sauce to go with this? This one worked very well:
Brood Witch Sauce (with sun-dried tomatoes)
6 cups of chopped tomatoes (about 5-6 large ones)
1/2 onion, chopped
5-6 sun-dried tomatoes, chopped.
1 clove of garlic, smooshed.
rosemary
oregano
pepper
salt(if the sun-dried tomatoes weren't already salty enough)
olive oil
Combine ingredients in a large pot. Cook on medium to low heat until it looks like sauce. Stir often, try not to burn it. Stir in no more than 1/4 cup (but probably much less) olive oil at the end. I added a few pinches of baking soda to even out the acidity.